As a yoga practitioner, I have observed a few asanas to be showing a powerful impact in reducing the fat around the stomach. Go through each asana in detail and practice each 3 to 5 times to reduce belly fat.
Before going to practice Yoga, you should tell yourself “No hurry! just calm down, take a deep breath and exhale all the stress(goal of reducing belly fat as well😉😊) and all other thoughts”.
1. Bhujangasana/Cobra Pose
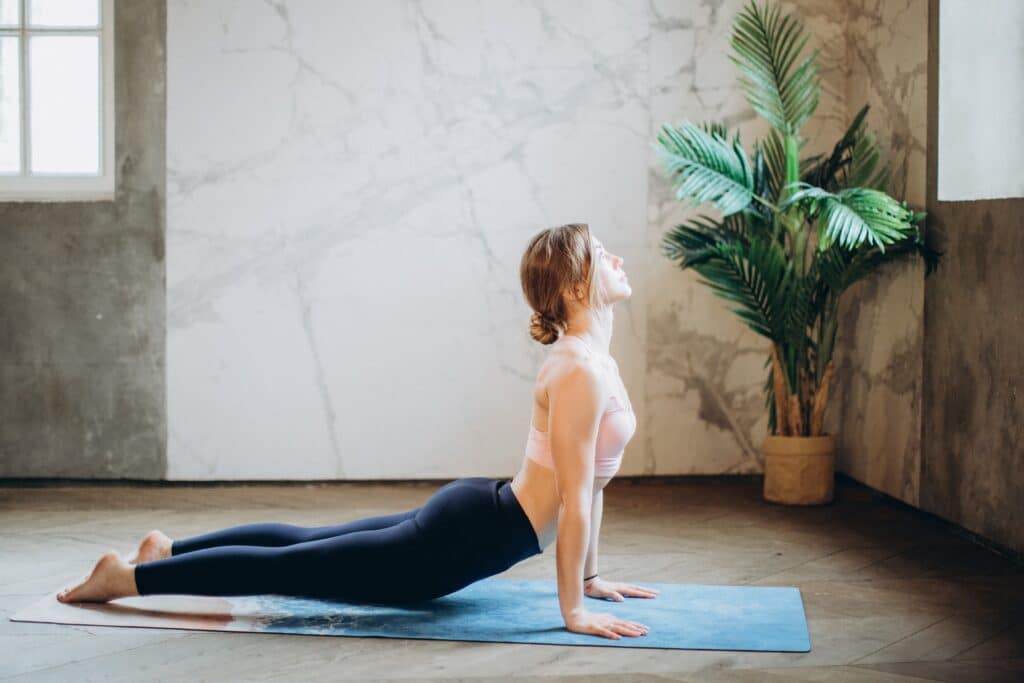
Position:
- Hold your hands and feet firmly in place
- Sliding the chest forward, raising the head, shoulders, and elbows before arching the back into the cobra position
- The hips and buttocks will be brought to the floor as a result. Bend your head back and look upward the eyebrow centre
- The arms support the trunk while the thighs and hips are still on the floor. The arms will continue to be slightly bent unless the spine is extremely flexible
Breathing:
As you inhale, lift your torso and arch your back.
Awareness:
Physical – on relaxation of the spine | Spiritual – on Swadhisthana Chakra
Contra-Indications:
Not recommended for those who have a hernia, peptic ulcer, intestinal TB, or hyperthyroidism.
2. Paschimottanasana/Seated Forward Bend Pose
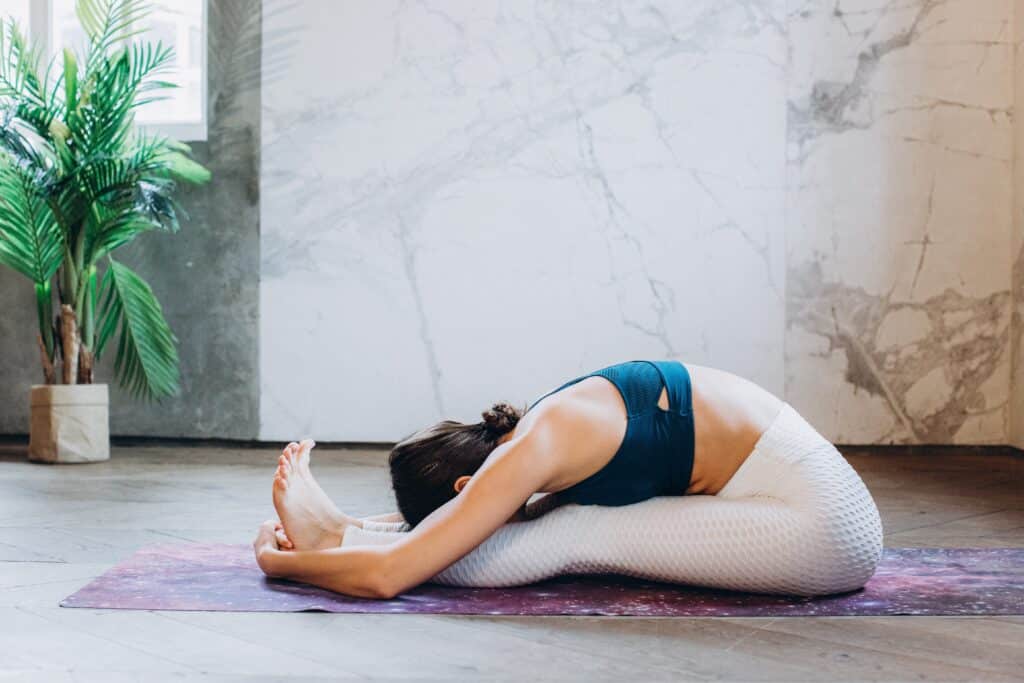
Position:
- Sit on the floor with your feet together, legs extended, and hands resting on your knees
- Relax your entire body. Gently stoop downward from the hips while gliding your hands along your legs
- With your fingers and thumbs, try to grab hold of your big toes. If it’s not possible, hold the heels, ankles, or any other area of the legs you can easily reach, without jerking or straining it, move slowly
- Hold the posture for a short while. Leg and back muscles should be relaxed, allowing for a light stretch. Begin bending the elbows and bringing the trunk down toward the legs while keeping a tight hold on the toes, feet or legs while keeping the legs straight and using the arm muscles, not the back muscles. With your forehead, try to touch your knees. Make no strain
- This is the final position. As long as it’s comfortable, maintain the position while relaxing and go back to the beginning position gradually
Breathing:
Begin by taking a deep breath. Breathe out slowly and bend forward. Inhale while remaining still. Exhale as you move your arms and trunk closer to your legs. In the final posture, breathe slowly and deeply or hold the breath out if holding for a brief period of time. Returning to the starting position, breathe in.
Awareness:
Physical: On the abdomen, the back and leg muscles loosening up, or the calm breathing.
Spiritual: On Swadhisthana Chakra
Sequence:
This asana should come before or after backbends such Setu asana, Chakrasana, Bhujangasana, or Matsyasana.
Contra-indications:
Do not perform this pose if one have a slipped disc, sciatica, or hernia.
Benefits:
- This pose elongates the hamstrings and makes the hip joints more flexible
- It tones and massages every part of the abdomen and pelvis, including the kidneys, adrenal glands, uro-genital system, liver, pancreas, and spleen
- It promotes circulation to the spine’s nerves and muscles, helps to reduce excess weight in this area
3. Naukasana/Boat Pose
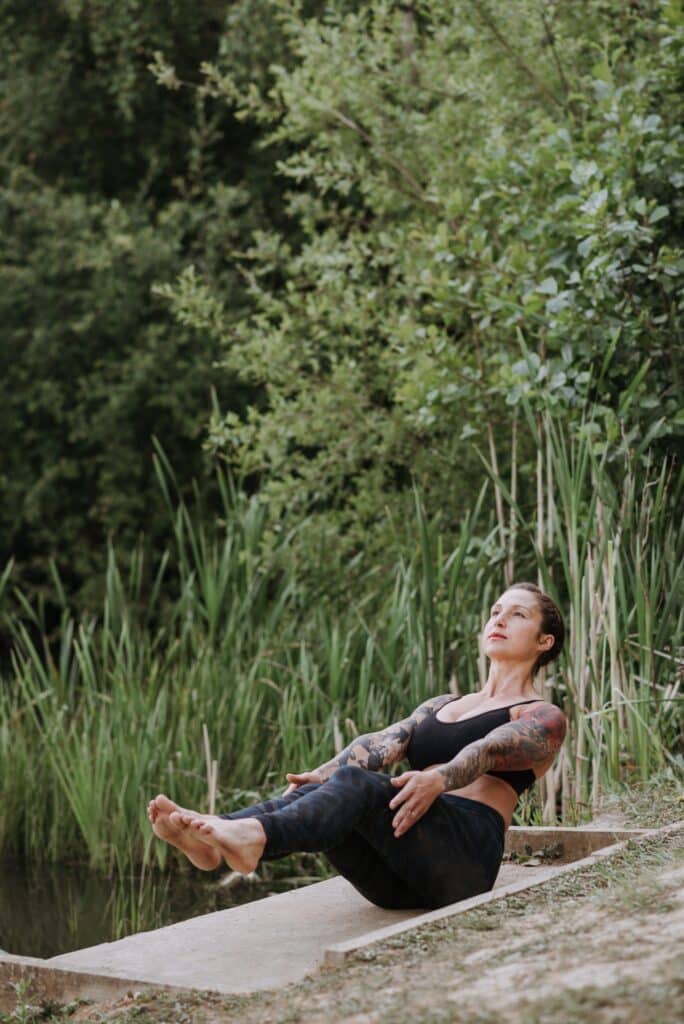
Position:
- Draw in a long breath Lifting the legs, arms, shoulders, head, and torso off the ground after holding your breath
- The maximum distance between the shoulders and the floor should be 15 cm
- Maintain a buttock-centered balance while maintaining a straight spine
- The arms should be raised to the same height as the toes
- The hands should be open and facing the toes with the palms down
- Maintain your final position while holding your breath and when you’re ready, lie back down and exhale
- After finishing each round, unwind in shavasana while gently pressing the abdomen outward while inhaling to loosen the abdominal muscles
Breathing:
Before raising the body, breathe in. Hold your breath while you raise, tense, and drop your body. In the supine position, breathe out.
Awareness:
On the motion, mental counting, tensing of the body, particularly the abdominal muscles in the final posture and breathing
Benefits:
It is very effective at reducing nerve tension and promoting deep relaxation
4. Dhanurasana/Bow Pose
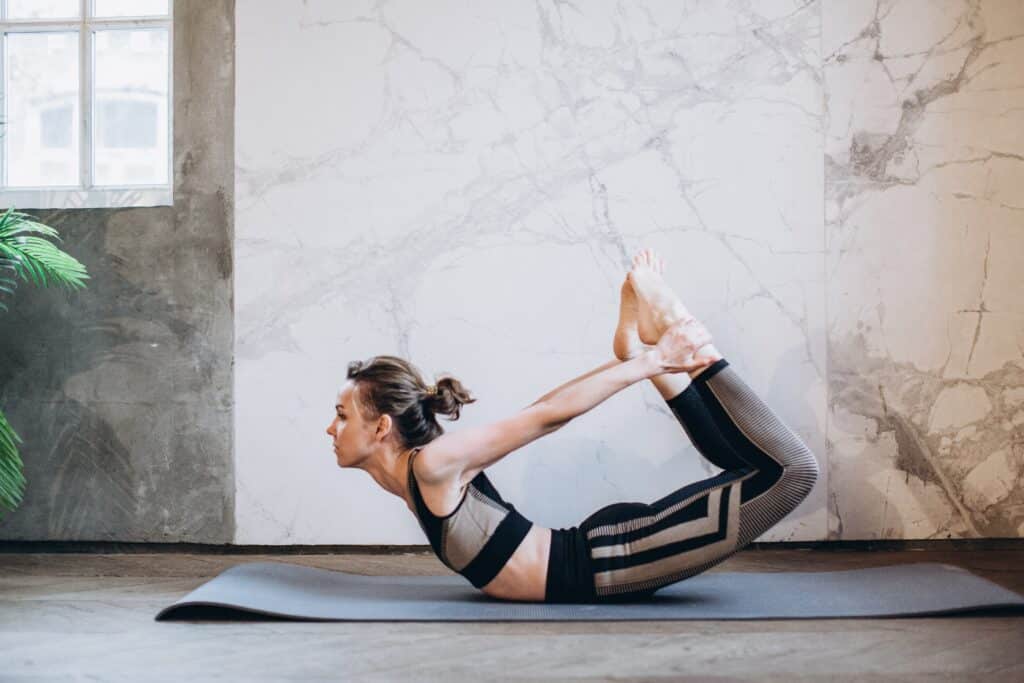
Position:
- Place your hands and arms next to your torso while lying flat on your stomach with your legs and feet joined
- Bring the heels up to the buttocks while bending the knees
- Hands should be wrapped around the ankles and put the chin down on the ground
- This is where everything begin. Push the feet away from the torso while tensing your leg muscles. Taking a backwards arc, lift the head, chest, and thighs all at once
- Arms should remain straight. The head is tipped back in the final position, and the entire body is supported on the floor by the abdomen. The back and arms do not tense up; only the legs’ muscles contract
- Hold the ultimate posture for as long as it is comfortable, and then slowly return the legs, chest, and head to the starting position by relaxing the leg muscles
- Release the posture and relax while lying down until breathing starts to return to normal
Breathing:
In the starting position, take a long breath. Hold your breath while you lift your body. Keep your breath inside for the last moment, or practice slow, deep breathing to make your body softly sway along with it. Exhale as you lie back down.
Awareness:
Physical: On the back, the abdomen, or its regular contraction and expansion in response to slow, deep breathing
Spiritual: On Manipura or Ajna Chakra
Sequence:
Bhujangasana and shalabasana should come before practicing Dhanurasana, which should be followed by a forward bending position. It shouldn’t be done for at least three to four hours following a meal.
Contra-indications:
One shouldn’t do this with a weak heart, high blood pressure, a hernia, colitis, peptic or duodenal ulcers, or if you have any of those conditions. Due to the stimulation of the sympathetic nervous system and the adrenal glands, this pose should not be performed right before bed.
Benefits:
- This pose restores the condition of the entire alimentary canal
- Massages are given to the muscles and liver. In order to balance their discharges, the pancreatic and adrenal glands are toned
- The excess weight around the abdomen is lowered while the kidneys are massaged. As a result, the digestive, excretory, and reproductive systems function better and gastrointestinal problems, dyspepsia, persistent constipation, and liver sluggishness are lessened
- It helps with the treatment of menstruation problems and diabetes and It enhances blood flow generally
- Stiffness is eliminated as the spinal column is straightened and the ligaments, muscles, and nerves are stimulated. It aids in reversing upper back hunching. It strengthens the leg muscles, particularly the thighs
5. Ustrasana/Camel Pose
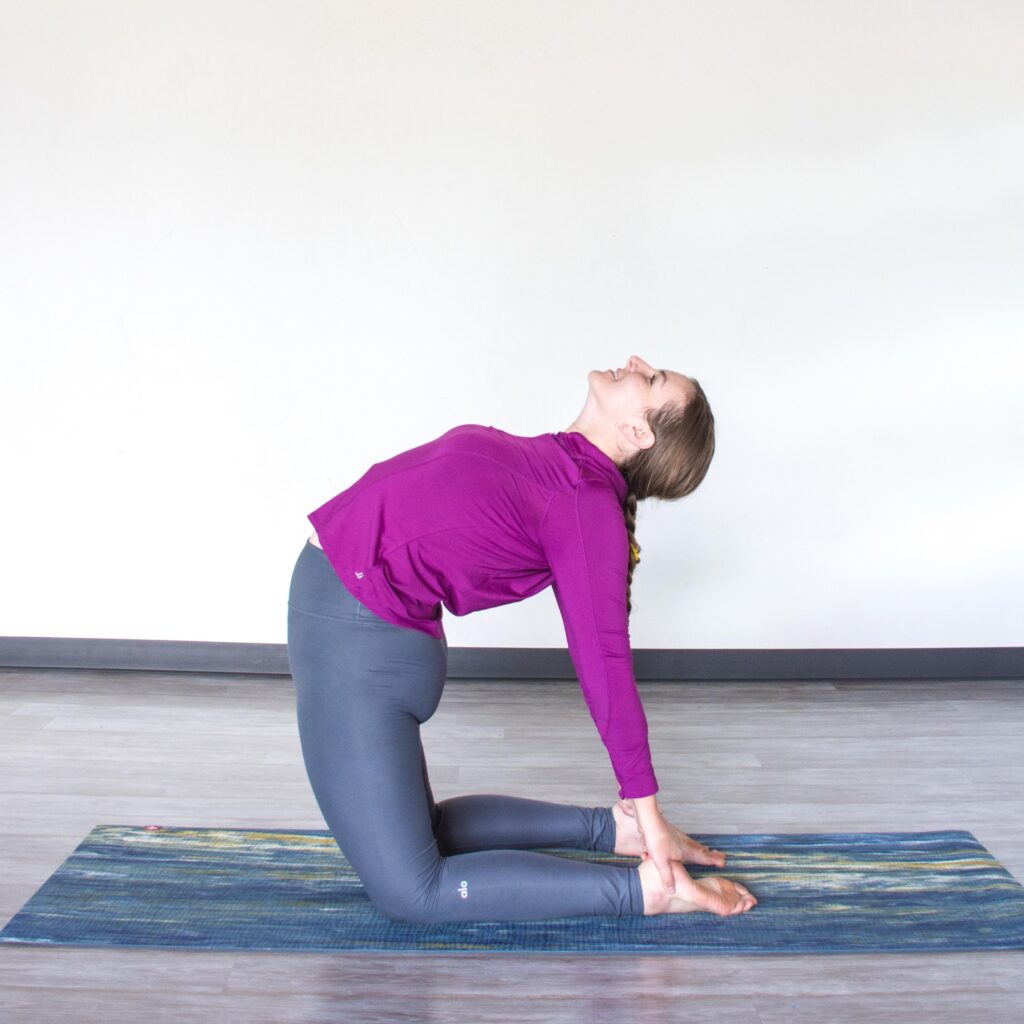
Position:
- Seated in Vajrasana.
- Put your hands at your sides and stand on your knees. Knees and feet should be in line, but they can be further apart if that feels more comfortable
- Slowly lean back while grabbing the right heel with your right hand and the left heel with your left. Avoid tension
- Bend the head and spine back as far as is comfortable while pushing the hips forward while keeping the thighs vertical
- Relax your entire body into the stretch, paying special attention to your back muscles. Legs and arms should equally bear the weight of the body
- To keep the back arch in place, the arms should anchor the shoulders
- If it is comfortable, stay in the final position as long as possible and slowly release each hand from the heels, going back to the beginning posture
Breathing:
Normal. Given that the chest is already stretched, avoid attempting to breathe deeply.
Awareness:
Physical: On the obdomen, throat, spine or natural breathing
Spiritual: On Swadhisthana or Vishuddhi Chakra
Sequence:
To relieve any back strain, it is crucial to perform forward-bending poses like Paschimottanasana immediately after this pose. Since it can be performed directly from vajrasana without needing to make any extra body movements, shashankasana is the most practical counter pose.
Contra-indications:
Without the supervision of a qualified teacher, individuals with serious back conditions like lumbago shouldn’t attempt this pose.
Benefits:
- This pose is healthy for the reproductive and digestive systems
- Constipation is cured by stretching the intestines and stomach
- Back pain, a rounded back, and drooping shoulders are all alleviated by the backward bending, which also helps to open up the vertebrae and stimulate the spinal nerves
- Better posture is noticeable
- Stretching the front of the neck completely notifies the muscles there and controls the thyroid gland
- People with asthma can benefit from it.
6. Balasana/The Child’s Pose
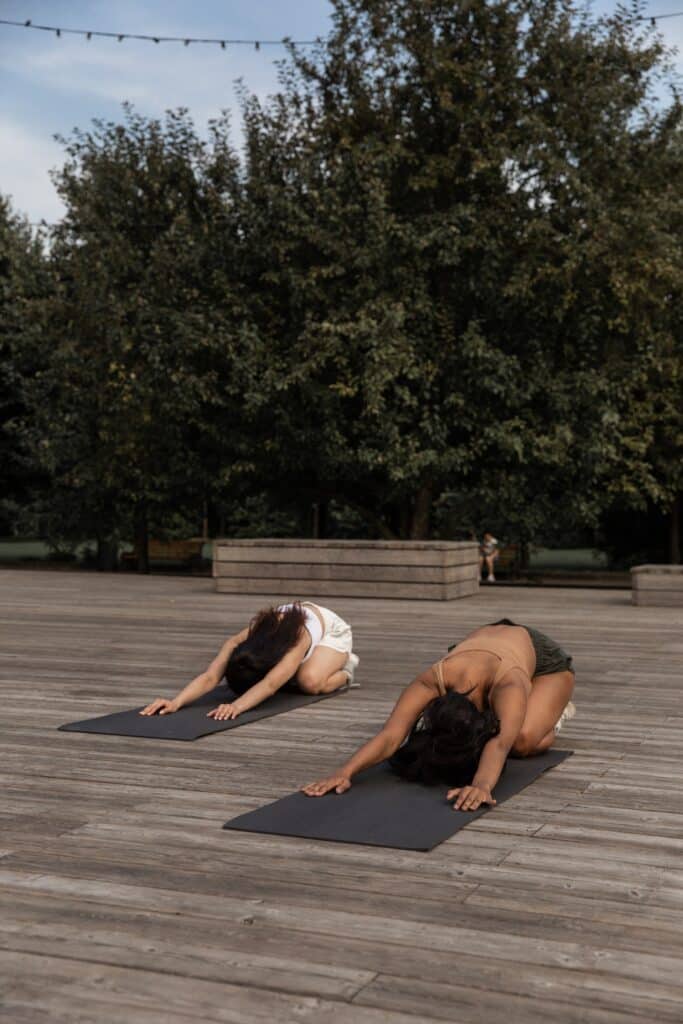
Position:
- Place your palms on your thighs slightly above your knees while you sit in vajrasana
- Keeping the spine and head straight, close your eyes and relax
- Raise the arms overhead while inhaling, maintaining them straight and shoulder-width apart
- Exhale and bend forward from the hips while keeping the arms straight and the head in alignment with the trunk
- The hands and forehead should land on the floor in front of the knees at the conclusion of the action
- If at all possible, the arms and forehead should make contact with the floor simultaneously
- Allow the elbows to rest on the floor and slightly bend the arms until they are completely relaxed
- Then take a deep breath while slowly raising your arms and trunk to an upright position and keep the head, arms, and trunk in alignment
- Exhale as you bring your hands to your knees
Breathing:
Beginners should gradually extend their duration in the final position until they can maintain it comfortably for at least three minutes while breathing normally. Increase the time to 10 minutes while breathing regularly in order to calm anger and frayed nerves.
Awareness:
Physical: When in the final position, focus on how your abdomen feels against your thighs; how your arms, neck, and head move into and out of the pose; and how your breath synchronizes with your movements. In the last posture.
Spiritual: On the Manipura or Swadhisthana Chakra.
Contra-indications:
Not recommended for persons with extremely high blood pressure, slipped discs, or vertigo.
Benefits:
- This pose separates the individual vertebrae from one another, relieving strain on the discs while stretching and strengthening the back muscles
- In some circumstances, this posture aids in the relief of this issue and promotes the discs to revert to their proper alignment. Additionally, it controls how well the adrenal glands work
- It benefits both the male and female reproductive systems and tones the sciatic nerves and pelvic muscles
- Constipation is relieved by regular practice
7. Santolanasana/Plank Pose
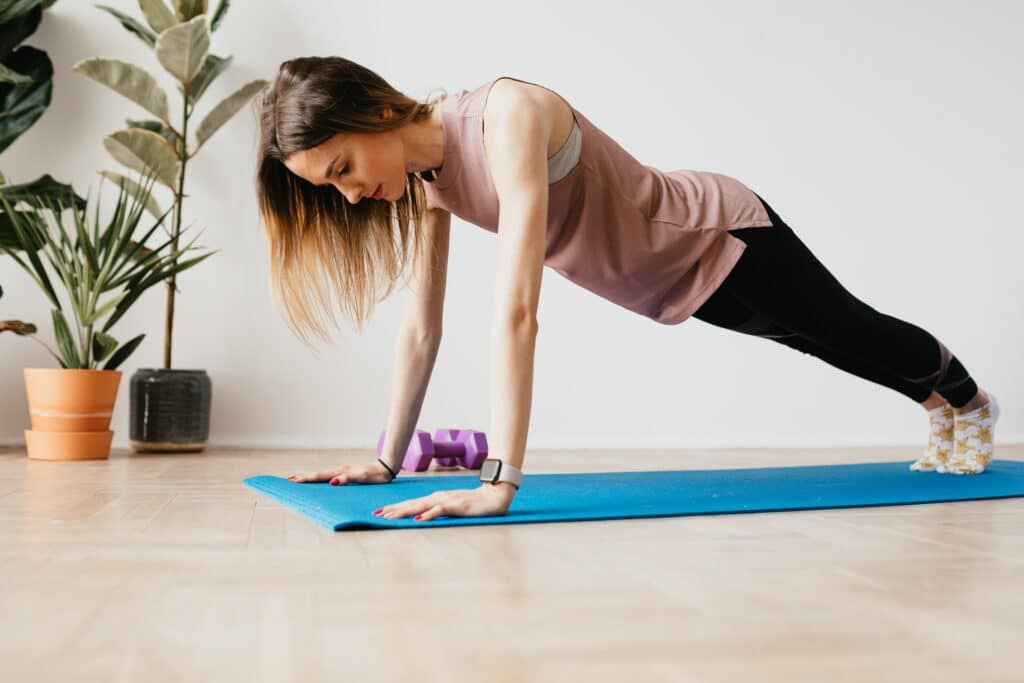
Position:
- Put yourself in Marjari-asana’s starting position
- Grasp the floor with your toes. The body should be straight by bending the knees, moving the shoulders forward, and dropping the buttocks. Arms should be straight
- Keep your frontal fixed point in your gaze. Hold on to the final position for a brief moment
- Kneel down to the ground. Relax in Shashankasana or Marjari Asana
Breathing:
Take regular breaths throughout the practice.
Awareness:
Physical: On maintaining balance and strength in the back, legs, and arms
Spiritual: On Manipura Chakra
Benefits:
This pose enhances nervous system balance and fosters inner equilibrium and harmony. It strengthens the thighs, arms, shoulders, spine and muscles.
8. Purvottanasana/Reverse Plank Pose
Position:
- Stretch your legs forward as you sit, 30 cm behind the buttocks, on either side of the torso, place the hands on the ground
- The fingers should be pointed back, the elbows should be straight, and the trunk should be slightly slouched. Lift the body upward by lifting the buttocks. Allow the head to hang down and back.
- Try to keep the foot soles flat on the ground and keep your legs and arms straight
- As long as it’s comfortable, stay in the final position. Drop your buttocks to the ground
Breathing:
Start by taking a deep breath. Hold your breath while lifting your body into the final position and holding it there. Breathe out as you return to the beginning posture.
Awareness:
Physical: On the abdomen, wrists, back and arms
Spiritual: On Manipura Chakra
Sequence: A preparatory pose for Chakrasana
Contra-indications:
People with high blood pressure, heart illness, cervical spondylosis, hernias, stomach ulcers, or weak wrists shouldn’t perform this asana.
Benefits:
Like Chakrasana, this pose has similar advantages. In general, it tones the Achilles tendons and the lumbar region of the spine while strengthening the shoulders, thighs, and wrists.
9. Parvatasana/Mountain Pose
Position:
- Reposition the left foot next to the right foot while maintaining the position of the hands and right foot
- Raising the buttocks and lowering the head to the level of the arms will create a triangle shape with the back and legs as the two sides. In the final position, the arms and legs are straight, and the heels are pointing downward
- The knees should be in line with the head and shoulders. Avoid tension
Breathing: As you raise your left leg, breathe out.
Awareness:
Physical: On relaxing the hips, stretching the shoulders, the back of the legs, and the area around the throat.
Spiritual: On Vishuddhi Chakra
Contra-indications:
Cautions for inverted postures apply
Benefits:
- The position strengthens the back, nerves and muscles as well as the limbs
- Stretching muscles and ligaments makes growing bones longer, which contributes to height gain
- Particularly in the upper spine between the shoulder blades, circulation is stimulated.