Complete guide to 12 Steps of Surya Namarskar (Sun Salutation) explained in detail that includes Breathing, Awareness and pose specific benefits.
- WHAT IS SURYA NAMASKAR (SUN SALUTATION)?
- WHAT ARE THE BENEFITS OF SURYA NAMASKAR (SUN SALUTATION)?
- WHEN TO DO SURYA NAMASKAR (SUN SALUTATION)?
- HOW MANY TIMES ONE CAN DO SURYA NAMASKAR (SUN SALUTATION)?
- WHAT ARE 12 STEPS OF SURYA NAMASKAR?
- STEP 1: PRANAMASANA (PRAYER POSS)
- STEP 2: HASTA UTTAHANASANA (RASIED ARM POSE)
- STEP 3: PADAHASTASANA (HAND TO FOOT POSE)
- STEP 3: ASHWA SANCHALANASANA (EQUESTRIAN POSE)
- STEP 5: PARVATASANA (MOUNTAIN POSE)
- STEP 6: ASHTANGA NAMASKARA (SALUTE WITH EIGHT PARTS OR POINTS)
- STEP 7: BHUJANGASANA (COBRA POSE)
- STEP 8: PARVATASANA (MOUNTAIN POSE)
- STEP 9: ASHWA SANCHALANASANA (EQUESTRIAN POSE)
- STEP 10: PADAHASTANA (HAND TO FOOT POSE)
- STEP 11: HASTA UTTHANASANA (RAISED ARMS POSE)
- STEP 12: PRANAMASANA (PRAYER POSE)
- PRACTICE:
- CONCLUSION:
WHAT IS SURYA NAMASKAR (SUN SALUTATION)?
The Sanskrit name Surya refers to the SUN and namaskara means SALUTATIONS. Surya Namaskara has been passed down from the enlightened sages of the Vedic era. The sun symbolizes spiritual consciousness and was worshipped every day in ancient times.
Surya Namaskara produces prana, which is the subtle energy that activates the mind and body. It is expressed in a stable, rhythmic sequence, reflecting the rhythm of the universe; the twenty-four hours of a day, the twelve zodiac phases of the year and the biological rhythm of the human body. Applying this form and rhythm to the body-mind complex produces transformative power, resulting in a more fulfilling and energetic life.
WHAT ARE THE BENEFITS OF SURYA NAMASKAR (SUN SALUTATION)?
Tremendous health benefits of Surya Namaskar are never ending and ongoing. Few of the major ones includes
Stimulates and balances all the systems of the body, including the Reproductive, Circulatory, Respiratory and Digestive systems
Strengthens the Back and helps balance the metabolism
Influence on the Endocrine Glands, helps to balance the transition period between childhood and adolescence in growing children
The best method for long-term healthy and balanced weight loss, time-tested
WHEN TO DO SURYA NAMASKAR (SUN SALUTATION)?
The ideal time to practice Surya Namaskar is sunrise, the quietest time of day or sunset. However, as long as your stomach is empty, you can practice Surya Namaskara anytime. Facing the sun as much as possible outdoors, practice.
HOW MANY TIMES ONE CAN DO SURYA NAMASKAR (SUN SALUTATION)?
For spiritual and physical benefits, beginners should start with 2 or 3 rounds slowly and add one more round every few weeks. Advanced should may practice a larger number of rounds; however, strain should be avoided at ll times.
WHAT ARE 12 STEPS OF SURYA NAMASKAR?
STEP 1: PRANAMASANA (PRAYER POSS)
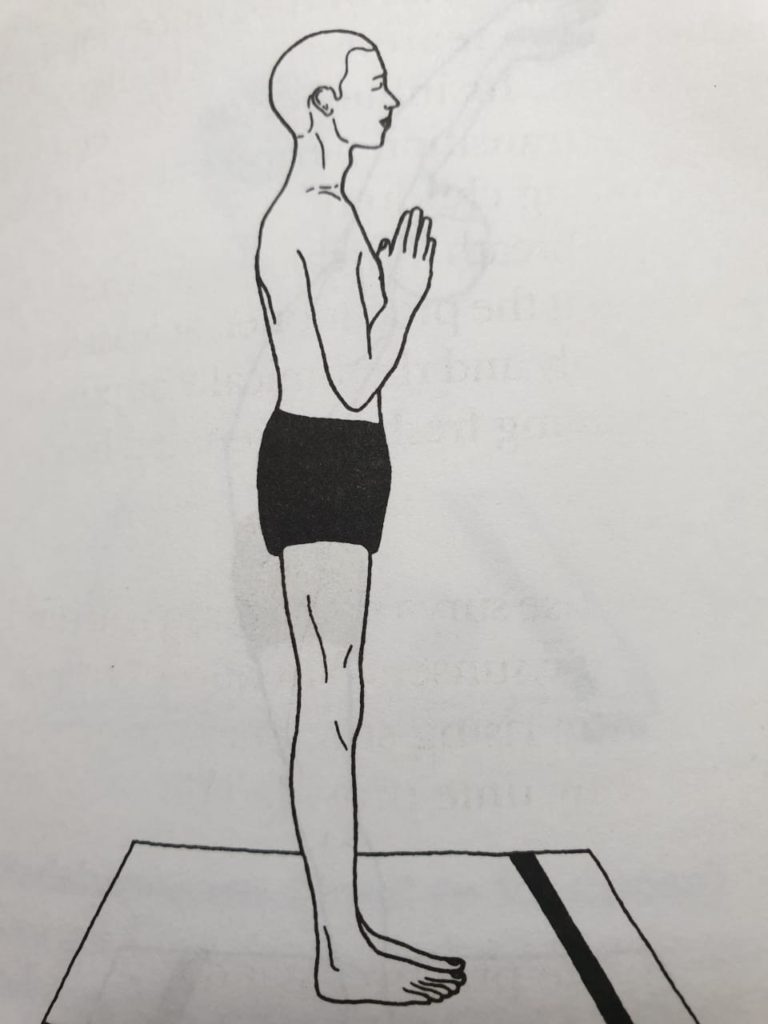
- Keep the eyes closed
- Remain standing upright with the feet together
- Slowly bend the elbows and place the palms together in front of the chest in namaskara mudra, mentally offering homage to the sun, the source of all life
- Relax the whole body
BREATHING: Breath Normally
AWARENESS: Physical – on the chest area: Spiritual – on the Anahata chakra
BENEFITS: This pose establishes a state of concentration and calmness in preparation for the practice to be performed
STEP 2: HASTA UTTAHANASANA (RASIED ARM POSE)
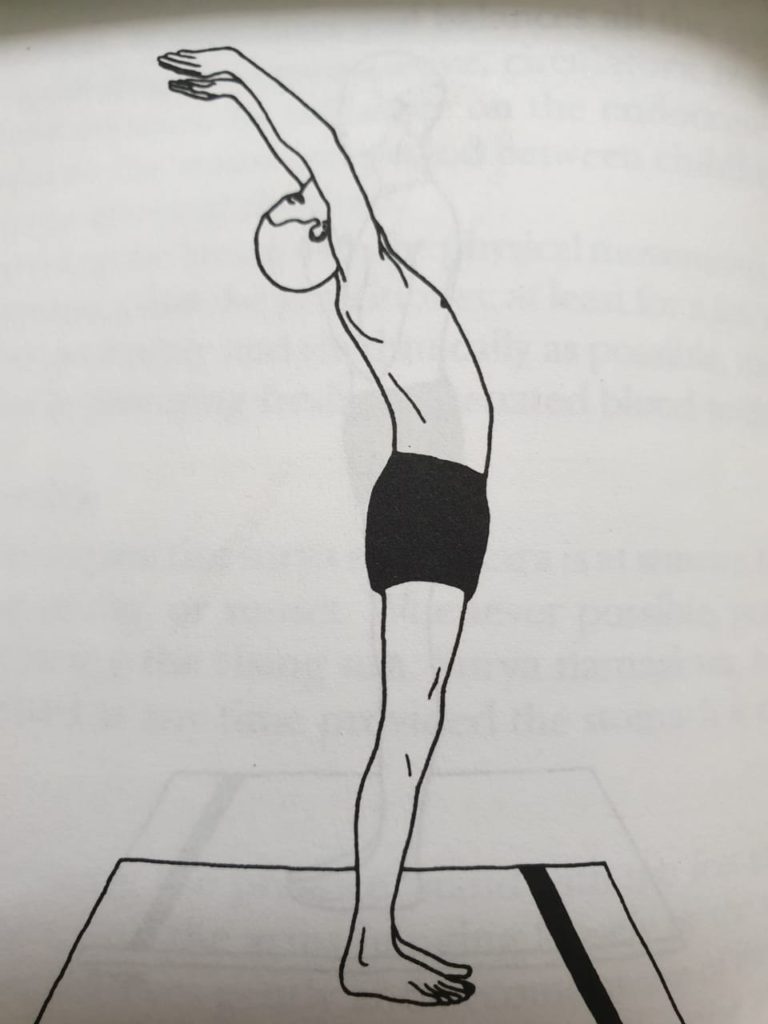
- Separate the hands, raise and stretch both arms above the head, keeping them shoulder width apart
- Bend the head, arms and upper trunk slightly backward
BREATHING: Inhale while raising the arms
AWARENESS:
- Physical – on the stretch of the abdomen and expansion of the lungs
- Spirutual – on Vishuddhi Chakra
STEP 3: PADAHASTASANA (HAND TO FOOT POSE)
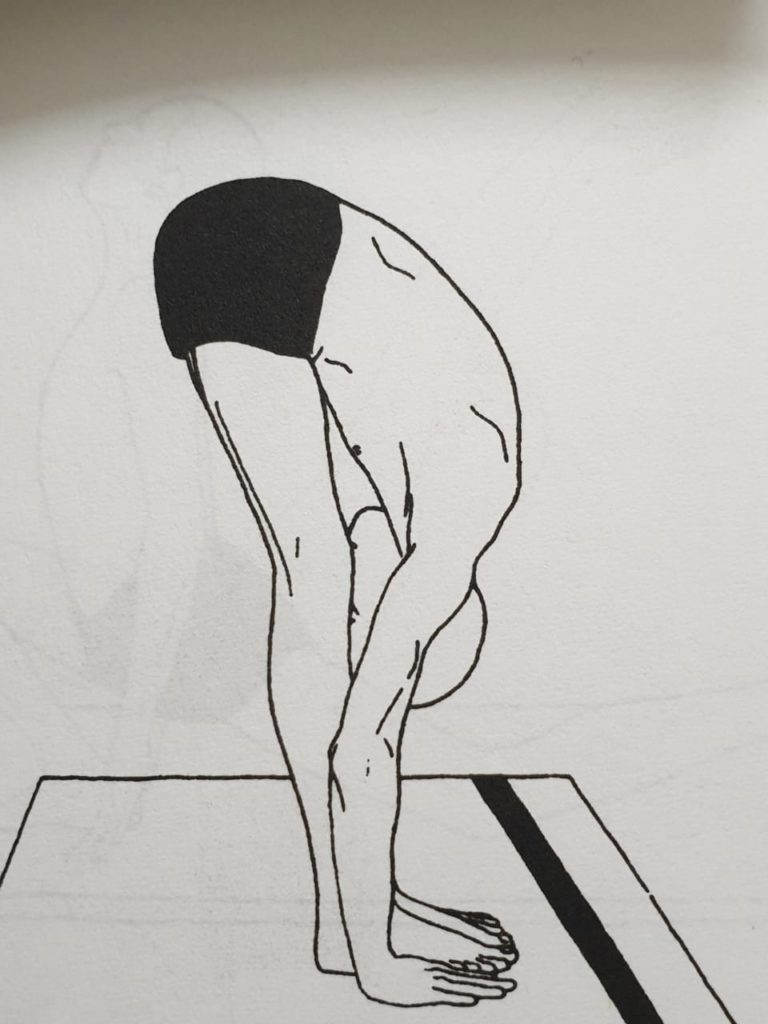
- Bend forward from the hips until the fingers or palms of the hands touch the floor on either side of the feet
- Bring the forehead as close to the knees as is comfortable
- Do not strain
- Keep the knees straight
BREATHING: Exhale while bending forwards. Contract the abdomen in the final position to expel the maximum amount of air from the lungs
AWARENESS:
- Physical – on the back and pelvic region
- Spiritual – on swadhisthana chakra
CONTRA-INDICATIONS: People with back problems should not bend completely. Bend from the hips and keep the spine straight until the back is at a 90-degree angle to the legs, or only bend within a comfortable range. Pay attention to the inverted posture.
STEP 3: ASHWA SANCHALANASANA (EQUESTRIAN POSE)
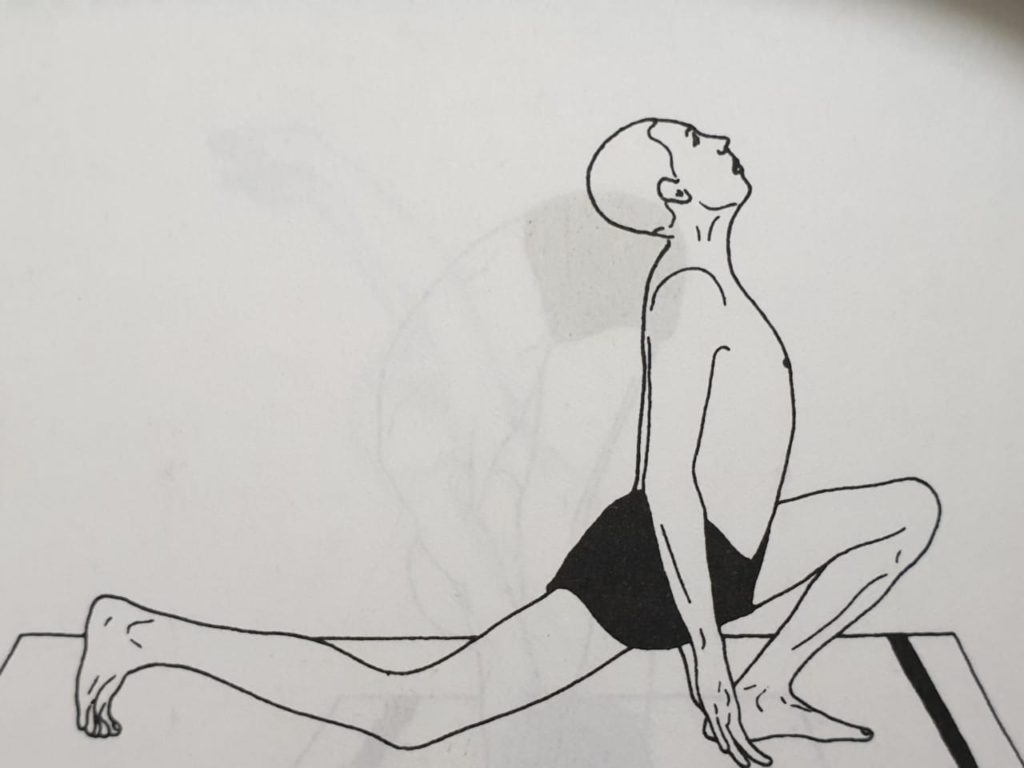
- Place the hands on the floor beside the feet
- Stretch the right leg back as far as is comfortable and grasp the floor with the toes
- At the same time, bend the left knee, keeping the left foot on the floor in the same position. Keep the arms straight
- In the final position, the weight of the body should be supported on both hands, the left foot, right knee and toes of the right foot. The head should be titled backward, the back arched and the inner gaze directed upward to the eyebrow centre
BREATHING: Inhale while stretching the right leg back
AWARENESS:
- Physical – on the stretch from the thigh through the lower back, and on the eyebrow centre while balancing
- Spirutual – on Ajna Chakra
CONTRA-INDICATIONS: The full stretch is not advised for people with knee or ankle problems
STEP 5: PARVATASANA (MOUNTAIN POSE)

- Keep the hands and right foot still and take the left foot back beside the right foot. Simultaneously, raise the buttocks and lower the head between the arms so that the back and legs form two sides of a triangle
- The legs and arms straighten in the final position and the heels come down towards the floor in the final pose
- Bring the head and shoulders towards the knees
- Do not strain
BREATHING: Exhale while taking the left leg back
AWARENESS:
- Physical – on the stretch through the Achilles’ tendons, the back of the legs, shoulders and throat region, and on the relaxing the hips
- Spirutual – on Vishuddhi Chakra
CONTRA-INDICATIONS: Cautions for inverted postures apply
BENEFITS:
- The pose strengthens the nerves and muscles in the limbs and back
- It helps to increase height by stretching muscles and ligaments, enabling growing bones to grow longer
- Circulation is stimulated, especially in the upper spine between the shoulder blades
STEP 6: ASHTANGA NAMASKARA (SALUTE WITH EIGHT PARTS OR POINTS)
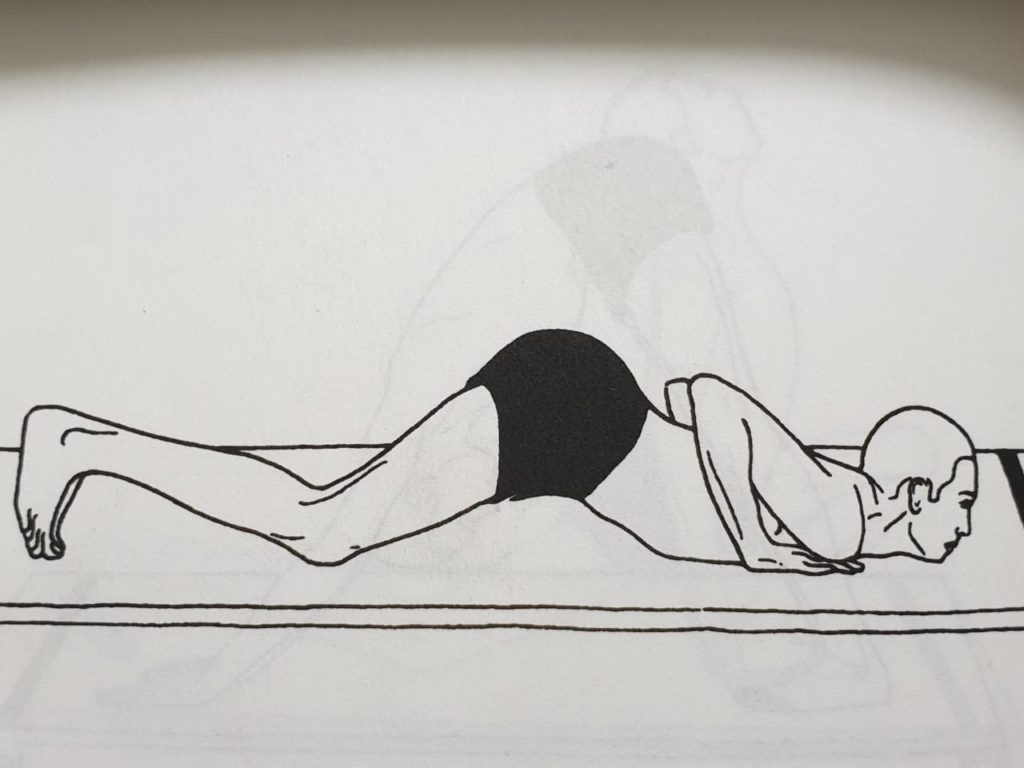
- Keep the hands and feet in place
- Lower the knees, chest and chin to the floor; the feet will come up on to the toes
- In the final position only the toes, knees, chest, hands and chin touch the floor. If this is not possible, first lower the knees, then the chest and finally the chin
- The buttocks, hips and abdomen should be raised
BREATHING: The breath is held out in this pose. There is no respiration.
AWARENESS:
- Physical – on the arch in the lower back and on the abdominal region
- Spirutual – on Manipura Chakra
CONTRA-INDICATIONS: People with serious back problems, high blood pleasure or heart conditions should not do this practice
BENEFITS: This pose strengthens the leg and arm muscles, develops the chest and exercises the region of the spine between the shoulder blades
STEP 7: BHUJANGASANA (COBRA POSE)
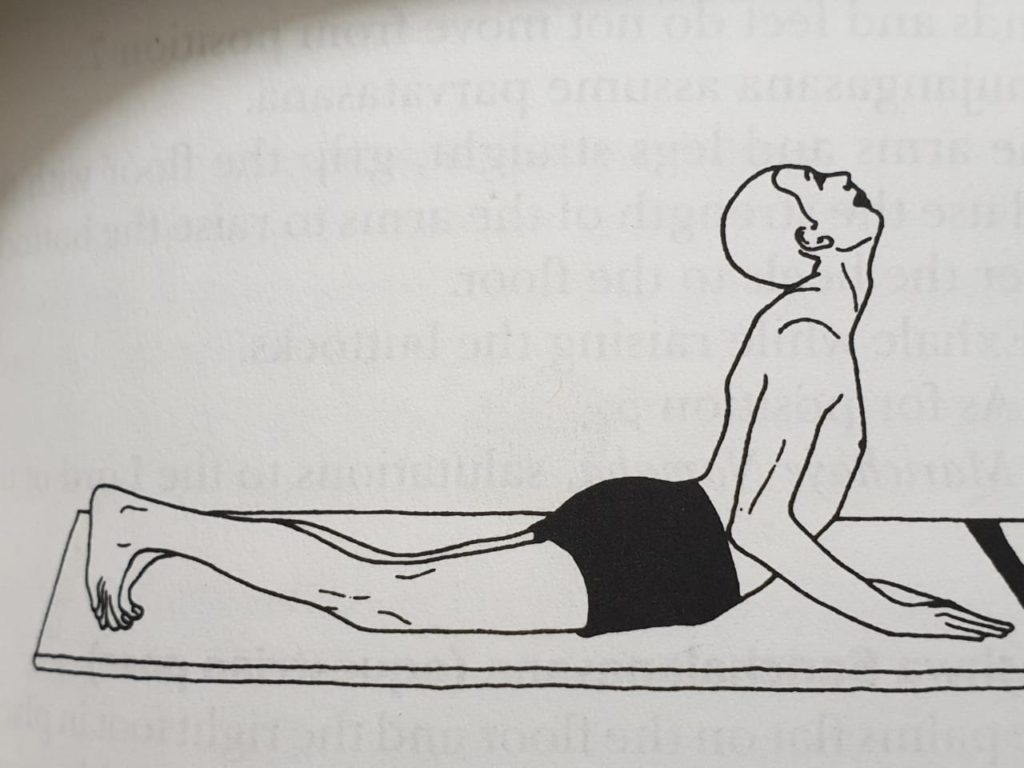
- Keep the hands and feet in place
- Slide the chest forward and raise first the head, the shoulders then straighten the elbows, arch the back into the cobra pose. This will lower the buttocks and hips to the floor
- Bend the head back and direct the gaze upward to the eyebrow centre
- The thighs and hips remain on the floor and the arms support the trunk
- Unless the spine is very flexible the arms will remain slightly bent
BREATHING: Inhale while raising the torso and arching the back
AWARENESS: Physical – on relaxation of the spine; Spirutual – on Swadhisthana Chakra
CONTRA-INDICATIONS: Not advised for people suffering from peptic ulcer, hernia, intestinal tuberculosis or hyper-thyroidism
STEP 8: PARVATASANA (MOUNTAIN POSE)
- The hands and feet do not move from position
- From Bhujangasana assume parvatasana
- Keep the arms and legs straight, grip the floor with the toes and use the strength of the arms to raise the buttocks an dlower the heels on the floor
BREATHING: Exhale while raising the buttocks
AWARENESS: Same as STEP 5 (PARVATASANA)
STEP 9: ASHWA SANCHALANASANA (EQUESTRIAN POSE)
- Keep the palms flat on the floor and the right foot in place
- Bend the left leg and bring the left foot forward between the hands. Simultaneously, lower the right knee so that it touches the floor and push the pelvis forward
- Tilt the head backward, arch the back and gaze at the eyebrow center
BREATHING: Inhale while assuming the pose
AWARENESS: Same as STEP 4 (ASHWA SANCHALANASANA)
STEP 10: PADAHASTANA (HAND TO FOOT POSE)
- Bring the right foot forward next to the left foot
- Straighten both legs
- Bring the forehead as close to the knees as possible without straining
BREATHING: Exhale while performing the movement
AWARENESS: Same as STEP 3 (PADAHASTANA)
STEP 11: HASTA UTTHANASANA (RAISED ARMS POSE)
- Keep the arms and spine in a straight line
- Raise the torso and stretch the arms above the head
- Keep the arms seperated, shoulder width apart
- Bend the head, arms and upper trunk backward slightly
BREATHING: Inhale while straightening the body
AWARENESS: Same as STEP 2 (HASTA UTTHANASANA)
STEP 12: PRANAMASANA (PRAYER POSE)
Bring palms together in front of the chest
BREATHING: Exhale while assuming the final position
AWARENESS: Same as STEP 1 (PRANAMASANA)
PRACTICE:
One round of Surya Namaskara is of 24 steps. The 12 steps of Surya Namaskara are practiced twice to complete one round. First half of 12 steps with right foot backward and second half of 12 steps with left foot backward.
In detail, in the second half of 12 steps, in the step 3 ( ASHWA SANCHALANASANA) instead of stretching the right foot backward, stretch the left foot back and in the step 9 (ASHWA SANCHALANASANA) instead of bending the left leg, bend the right leg and bring the right foot between the hands.
DURATION: For spiritual and physical benefits, beginners should start with 2 or 3 rounds slowly and add one more round every few weeks. Advanced should may practice a larger number of rounds; however, strain should be avoided at ll times.
CONCLUSION:
After completing Surya Namaskar, practice for a few minutes. This will normalize the heartbeat and breathing, and relax all muscles.
MY PERSONAL EXPERIENCE:
Surya Namaskara (YOGA) and Meditation is part of my daily routine. I can say its a life changing experience for me which built a thread between all the parts of myself: body, mind, and spirit. Its a delicious food which soul and body crave for!
Hey you! Wonderful soul! start today and experience the real joy of life and you deserve it 🙂
“The rhythm of the body, the melody of the mind and the harmony of the soul create a symphony of life,” BKS Iyengar’s